

This guide will walk you through creating, exploring, and understanding your first project plan with Agilien.
Step 1: Define Your Project
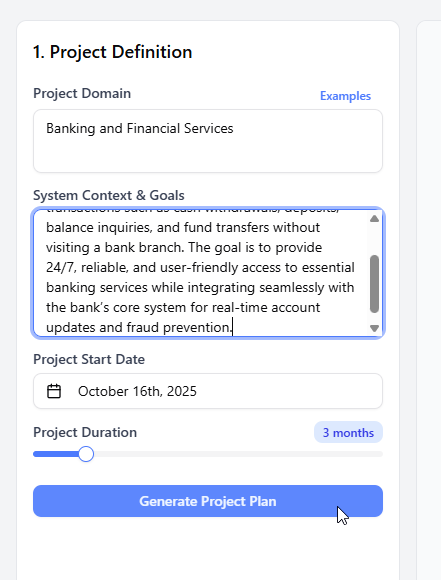
The first panel on the left is the Project Definition area. This is where you provide the AI with the necessary information to build your plan.
- Project Domain: Enter a concise, high-level description of what your project is. For example, “An e-commerce platform for handmade goods.”
- System Context & Goals: Provide more detail here. Include the target audience, key features, technical constraints, or specific goals. The more context you give, the better the result will be.
- Project Start Date: Select the starting date for your project. The AI will use this as the anchor for all scheduling.
- Project Duration: Use the slider to set the overall duration of the project in months. The AI will schedule all work to fit within this timeframe.
Note: If you’re unsure where to start, click the Example Gallery button to load a pre-defined project idea.
Once you’ve filled in the details, click the Generate Project Plan button. The process may take a minute as the AI constructs the entire hierarchy.
Step 2: Explore the Hierarchy
After the generation is complete, the Project Hierarchy will appear below the definition form. This is a tree view of your entire project.
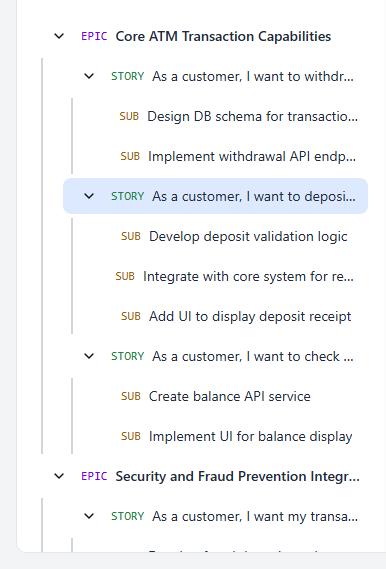
- EPIC: The top-level items, representing major features (e.g., “User Account Management”).
- STORY: User Stories nested under Epics, describing a user need (e.g., “As a user, I want to reset my password…”).
- SUB: Technical Sub-Tasks nested under Stories, outlining the development work required (e.g., “Create password reset API endpoint”).
Click the arrow icons to expand or collapse items and explore the structure. Click on any item’s title to select it.
Step 3: View Details and Diagrams
When you select an item in the hierarchy, its details will appear in the middle Detail Panel.
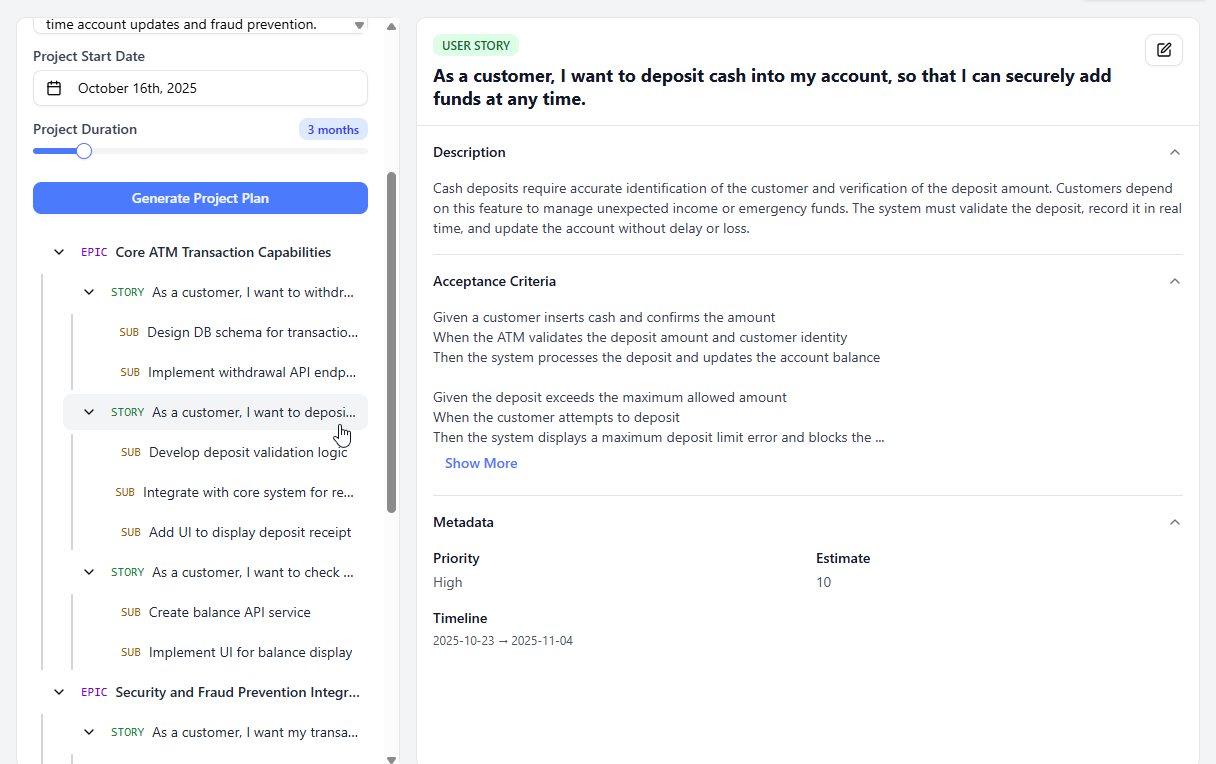
Here you can see:
- The full title and description.
- Acceptance Criteria (for User Stories).
- Priority, estimate, and scheduled timeline.
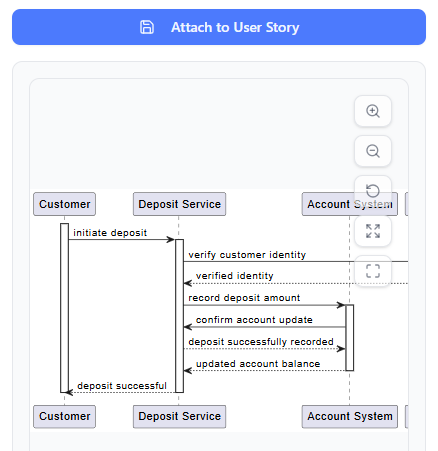
The panel on the right is the Diagram Workbench. This is where you can bring your work items to life.
- With an item selected, choose a diagram type (e.g., “Sequence Diagram”).
- Click Generate Diagram.
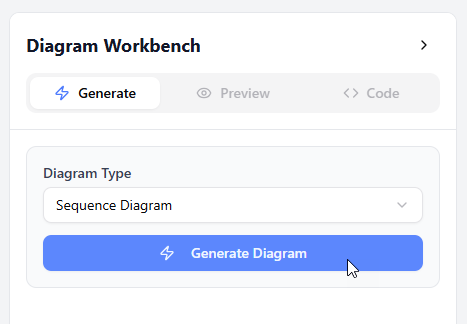
- The AI will analyze the selected item and generate a PlantUML diagram to visualize it.
Congratulations! You’ve just generated and explored your first AI-powered project plan. In the next sections, we’ll dive deeper into editing, diagramming, and Jira integration.